Nightmare’s claw design varies widely depending on
which piece of art you’re using, and the model used in Soul Calibur 4 really
likes to clip through itself for any fist-like gestures. What this meant was
that I had some latitude to design a more physically possible arm for terrorizing folks.
For the early part of the build, I was playing around
a lot with different pieces, and consequently didn’t document very well. The
base I ended up with used a 1”x2” pine board with a half-circle of 5” PVC
tubing screwed onto the end to give my hand working room. I mounted little
stubs of ¾” pex (plastic) tubing onto the PVC as mounting points for the
fingers, which are simple lengths of 1” vinyl tubing with notches cut into them
where the fingers would bend. I ran some fairly heavy nylon rope up these and
anchored them in the inside tips with nails bent into hooks.
Dexterity: down to zero. This thing was a big goofy
mallet to swat people with. Well, then came carving, and things got better:
Then I started coating the claw in a layer of black,
paintable silicone caulk.
Well naturally, this was where crunch time came up
again. The armor plates are simple 6mm EVA foam attached with excessive hot glue, with an extra strip of 3mm
foam to serve as edging and add a bit of zazz. I hit the whole mess with the
same 50/50 mix of PVA and matte black interior paint, then shiny blue automotive
spraypaint, and then the black, orange, and gray details with an airbrush. The
golden edging had to go on by hand, though – I was actually doing that part in
the hotel. Consider this the usual cautionary tale about budgeting your time.
Final result, though, was this menace:
Here is a detail of the organic, kind of crappy texture on the
talons. The torso had the same treatment, but the harder acrylic caulk and non-flexing
surface turned out much better.
And just so you know what I think of Yoshimitsu:
The claw weighs about 5 pounds, all told. This makes it fine for occasional wear, but holding it out from the body for prolonged periods (i.e. when you need to keep from tearing off your skirt-spike-things for a two hour tour in costume) is a bad time.
So between the claw and the torso, some lessons learned:
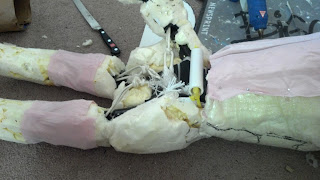
1. Expanding foam is terrible. It contracts irregularly and forms enormous gaps and holes below the surface.
2. Omit this if your outer layer is a different material. Carving it down can produce an excellent three-dimensional base for hot-gluing EVA to, for instance.
3. Caulk is generally not a good substance to use either, due to weight and the difficulty in shaping it. It *can* work for a semi-yielding, tough finish on an organic piece. I’m going to try some other (more professional) acrylic options in the future, but you can’t beat the $2.50/tube price tag.
4. Casting over body forms is an awesome way to cheaply build up a shape and know you’ll fit into it.
5. Make things lighter. I am reminded of this this every year, but I’m still having trouble achieving it.


No comments:
Post a Comment